Announcement

Collapse
No announcement yet.

Amadun's Tutorials (updated with .Dat Editing for Newbies)

Collapse
This is a sticky topic.
X
X
 
  • Filter
  • Time
  • Show
Clear All
new posts

  • Amadun's Tutorials (updated with .Dat Editing for Newbies)

    I've decided to write a series of tutorials to show what goes into the creation of one of my skins. A lot of it is simply: /poke /poke /prod /prod “Hmmm, that looks good.” But I thought it would be interesting to do, nonetheless.

    I’ll be going through my reskin of the Mithran THF AF. To start off with, I thought I’d go into detail on the planning part. (It also covers the most basic painting and modeling.)

    In my thread on the Alla forums I got this request:

    “Ok, time for me to put in my own request…I can't find is anything decent to replace my THF AF with. There just seems to be nothing out there that fits the THF spirit. In my desperation I even loaded up this one exotic dancer .dat collection and it was just way too skimpy, so I'm back to normal AF here.

    So…could you cook up some THF AF .dats that don't make my poor Mithra look like a whore or as if she belonged up on a camel in a desert somewhere? :3 Would be greatly appreciated. I was thinking something sort of loose, in either the usual colors or possibly a red, showing a little skin/fur but not so much as to make me feel dirty. Maybe with a hairpin or circlet or beret in place of that awful bonnet thing, or even a ribbon.”

    So the first thing I did was went and looked for some inspiration. Google is your friend for this stage. I also went and looked at some of the art on Elfwood (a huge online fantasy gallery). If you want, start gathering a file of reference photos and drawings. Any time something catches your eye, save it to that file. For example, on my computer, I have a file of costumes, a file for interesting shading effects, a file for folds (for cloth and such…I also put cool hairstyles there), and a file for poses (This isn’t really applicable to this situation, but I have it there for drawing practice.)

    Here’s where you need to think of what exactly you’re planning to make. Ask yourself: “Is this going to be in the feel of the game? Do I want it to be realistic, modern, or fantastical? How much detail do I want? How much skin do I want to show?” I’ll address these questions more in later tutorials.

    In my case, what it boiled down to, was, that the general feel of a Thief’s armor was something lightweight and darkly colored. Going off of this thought, I pulled out Model Viewer and started flipping through the models. While I looked for possibilities, I sketched out the first idea:
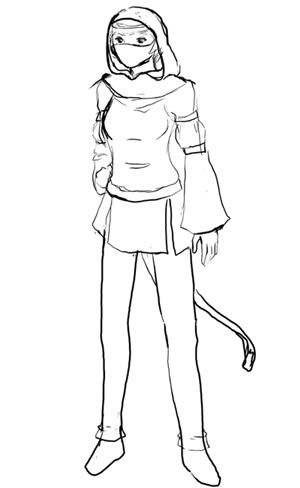


    Now, I use my sketches to help come up with ideas. I have so many projects that I don’t want to forget any details that might come to mind. I’m not saying, “Oh, you don’t put any ideas onto paper? You noob!” It’s just the way my mind works, I think better if I put the idea down on paper, and I like to have plenty of sketches before I commit to a costume. You, on the other hand, may like to just start working and let the ideas flow. That’s okay too.^^

    But I digress. Anyway…off of this first sketch I made the model that I’ve posed around the forums:
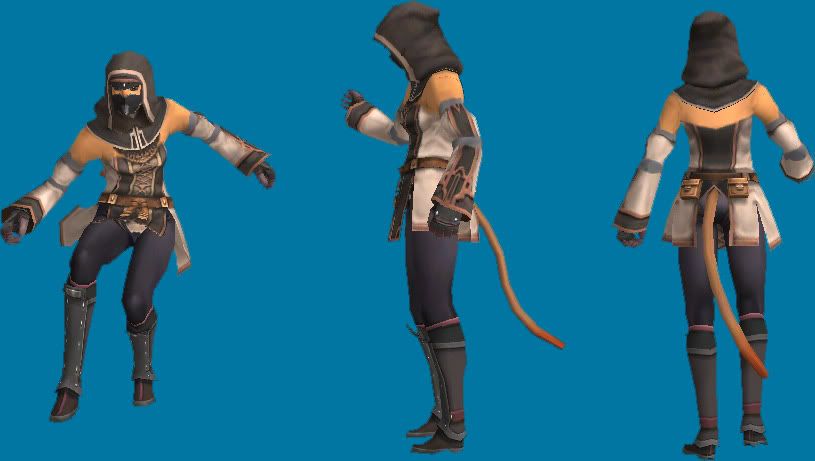


    From there, I went to the /poke /poke /prod /prod stage. I wasn’t sure what I wanted the details to look like, and so I just started painting in the hopes of getting a flash of inspiration. I decided that the arms looked too thick to be bare, so I came up with the idea of leather armor under cloth.
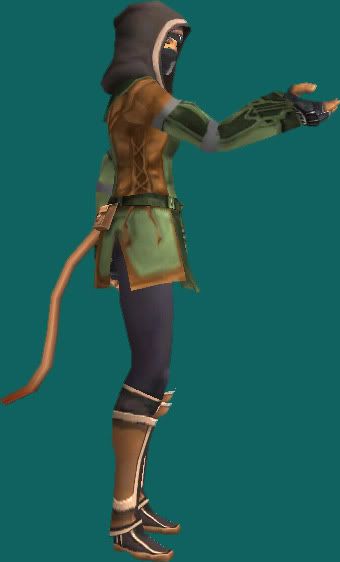


    Ewwwwwwwww…..

    Okay, well, I liked the lacing, and I liked the mask, and I liked the leather….but my mithra now looked like a refugee from Sherwood Forest. Great. Let’s throw that color scheme out the window and come up with a new idea.

    Continued in next post...

  • #2
    Re: Tutorial: Inspiration and Planning

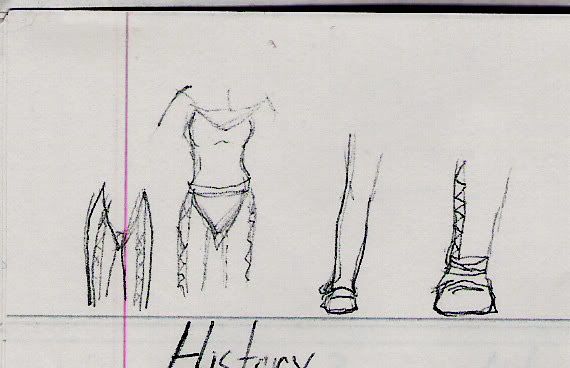
    Enter stage two: Sketching in class. Ehehehehe…. A lot of my notebooks’ margins are filled with half-inch-tall sketches. Not paying attention in class aside, these are extremely good for gathering your thoughts.


    In this example, you can see the thought progression. These are really the only sketches I did for this set of armor, since I came up with an idea that I liked so quickly.

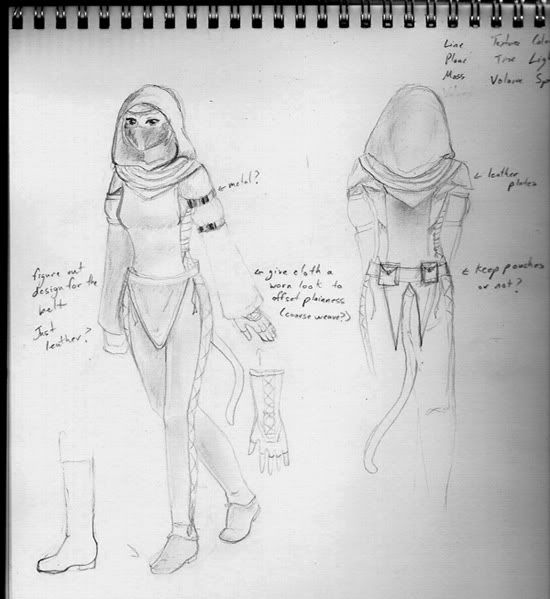
    At this point, I could have sat down and painted some more off of these sketches, but I wanted something bigger and better drawn to work off of. So, I pulled out an actual sketchbook (le gasp!) and drew a character design.


    I made notes, as you can see, on points that I still wasn’t sure on, as well as thoughts on the texture and such. It’s not set in stone yet, but it’s much more solid than it was when I started.

    As I said before, this is just how I plan my skins. If you’re having trouble organizing your thoughts, you can give it a try. But it’s certainly not a guide that says that it’s the only way to go. For a most basic example, if you’re just planning to recolor some armor…don’t do this. Please. You’ll make me worry about your sanity. If you like to keep ideas in your head, by all means do that. This is just a few suggestions to help you get organized, or to come up with ideas.

    To be continued in Guide #2: Painting, or “You really didn’t need your eyes, anyway.”

    Comment


    • #3
      Tutorial: Painting (Tips and Tricks)

      One of the hardest things about making realistic armor .dats is trying to paint them onto a 256x128 pixel canvas. Even trying to enlarge-paint-shrink the canvas doesn’t work very well. So many of your fine details have a tendency to get lost in the process. So it’s best to teach yourself to work with the space that you have.

      This tutorial is meant to give you an idea of how to best use the space that you have to make your armor look realistic. I don’t have the room to go in depth into each thing, so I’ll just skim the surface, and make separate tutorials later.

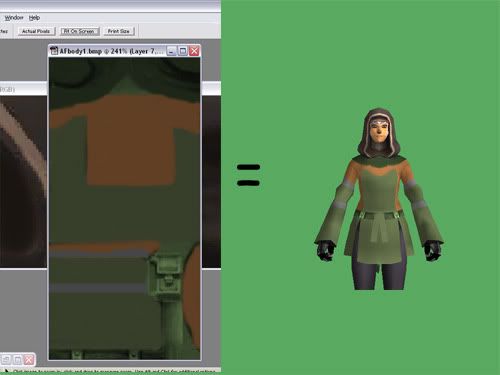
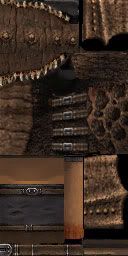
      Back to my THF AF. I’m starting with the skin for the tunic. When you pull that out of the Model Viewer, you’re facing two separate bitmaps. One of the hood and one of the body. Now with many of the skins, you may find yourself wondering… “Just where does that GO?” Soooooo…..

      #1-Finding your parts.

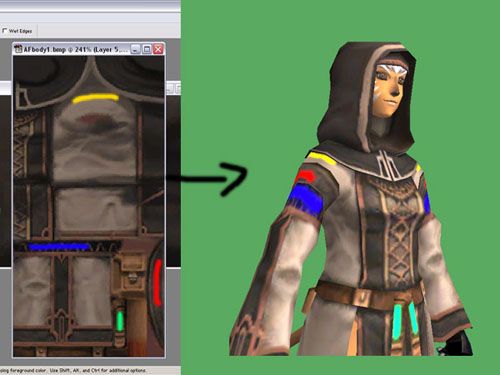
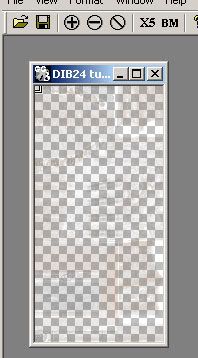
      If you have a .dat (and especially in some of the smaller ones – lizard helm for example) it can get really hard to figure out what goes where on your model. If you have that problem, pull out a new layer and color-code your parts. Use nice, bright colors.


      This can also be helpful to figure out how things line up, and how they get stretched. (Note the blue line compared to the yellow.)

      #2: Always keep a layer way at the bottom of your original skin – That way, you don’t have to pull out a whole new one if you screw up beyond all repair.

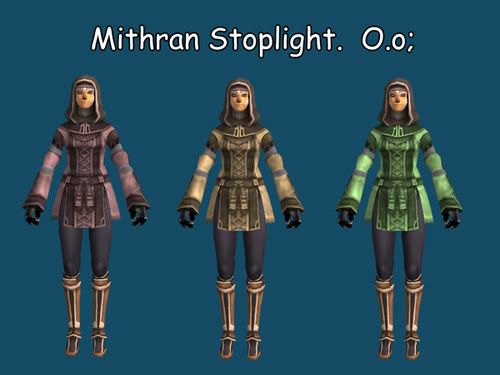
      #3- Start out vague. No need to jump right into detailing a skin. Start out by getting your colors right. Feel free to try a few.


      Hmmm…the green isn’t actually all that bad. It just needs some work. Now, open another layer and paint in your big shapes. You can use a separate layer for each color if you like. Flatten, save and take a look.


      Hey, a skin! Alright…her tail is green and it looks like you wrapped her up in paper, but it’s there. We’ll worry about alpha mapping and the like later. In fact, do that last, unless you need to see part of a skin that’s covered by something else. (Barone armor comes to mind.)

      #4- Shading. Here’s the hard part, and where the “Tricks” part of the tutorial really kicks in. The number one-and most important-part of shading is: Your light source is from the top. Said source actually changes in game, and I’ll show you another trick with that, but for now: Shade as if you’re standing under a street lamp. Look at your original skin if you need any guide on that. (That’s why we kept it. Aha!)

      Trick #2: Metal
      Now…metal is tricky. It reflects stuff in weird ways and insists on looking odd no mater what you do. Especially large areas of metal. Chainmail is a whole new tutorial, but I’ll cover those metal armbands here.
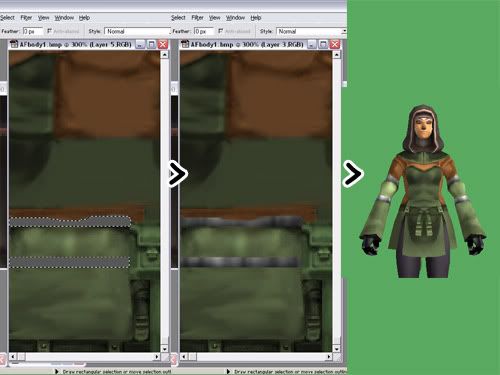
      -Take those nice gray bands and select them. Now pull out your burn and doge tools and make stripes. I’m not kidding, honest. Then put an extra dodge along the whole top and a burn along the whole bottom. Ta da. Basic metal shading, or a pretty good impression thereof.


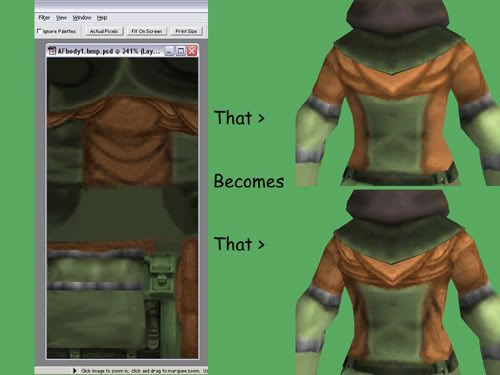
      Trick #3: Leather. Leather is not a flat, plain surface. Leather has cracks, leather has seams…Hooray for the noise filter. Pick out a nice light color and a nice dark color and add just a touch of noise to the layer you’re working on. Then Gaussian Blur it just a little. Not too much in either case. Find out what looks good. Then use the burn and dodge tools to put in a couple of seams. Burn in the seam, then add a dodge on either side. Again, we’ll tweak the better shading later.


      Other Tips:

      -Stark white looks baaaaaad. Use a light gray whenever possible. The white shows up as a glaring empty-looking area ingame.

      -Along the very edge of your canvas, there’s a 1-pixel-wide strip somewhere that has a tendency to overlap to the other side of your model. That’s why you sometimes see those bikini-wearing mithra with a black stripe down their front. I don’t know why this happens. I’m not positive how to fix it. Just a warning more than anything.

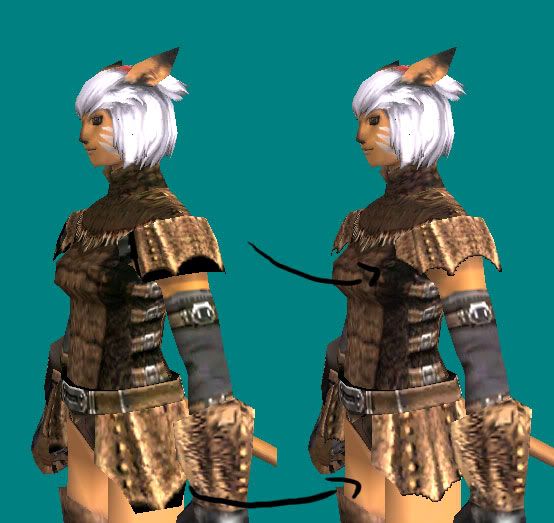
      -If, after editing a mesh, you discover that the texture map as been warped, (look at the armbands on the THF mesh for an example. It used to be even worse.) feel free to open it up in Metasequoia again and move the vectors around until it looks right. Nothing is ever set in stone.

      Feel free to post questions and other tips of your own in this thread.

      Next tutorial: Up to you guys. Vote in the pretty little poll up top, (If it works, that is.) and let me know what you want to see.

      Comment


      • #4
        Tutorial: .Dat Editing for Newbies

        Okay, I've gotten a lot of requests to help people with their troubleshooting lately. Unfortunately, I'm so busy with school, I just don't have the time to answer them all. So here's a basic, all-you-need-to-know, tutorial. (It's huge, I know...)

        -First off, here's all the links you should need to start up .dat editing.

        GIMP Image editing program:
        http://www.gimp.org/

        Photoshop tutorials:
        http://www.good-tutorials.com/

        Original VRS page:
        http://www.credes.com/product/80/index.html

        English Translation of VRS (sign up for the forums there to be able to download):
        http://www.ffximc.com/

        Metasequoia:
        http://www.metaseq.net/english/index.html

        English Model Viewer:
        http://www.folye.net/

        Graphics Converter 3:
        http://homepage1.nifty.com/open-prog/warehouse.html

        Phabin's Site: (And thank you, Phabin for being the one to start me off on all this.^^)
        http://phabin.folye.net/

        (Note: I haven't ever tried GIMP, but it's free, so hey...)

        Basic Overview of the Model Viewer


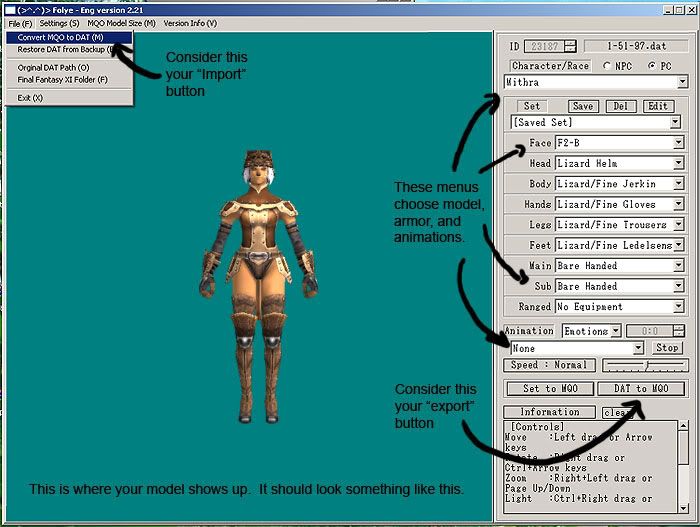
        [Controls]
        Move: Left drag or Arrow keys
        Rotate: Right drag or Ctrl+Arrow keys
        Zoom: Right+Left drag or Page Up/Down
        Light: Ctrl+Right drag or 2,4,6,8
        Right: F1 or D
        Left: Shift+F1 or A
        Top: F2 or W
        Bottom: Shift+F2 or Z
        Front: F3 or S
        Back: Shift+F3 or X
        Reset: F4 or Space
        S.Shot: F11

        Now to start editing!

        -Step 1 (This is a biggie.)

        BACK UP YOUR FILES.

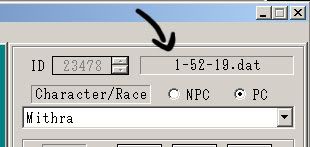
        After you choose what model you want to edit, look up in the upper-right-hand corner of the model viewer. You'll see a number that says something like: 1-52-19. That means your .dat is in ROM >>> 52 >>> 19.


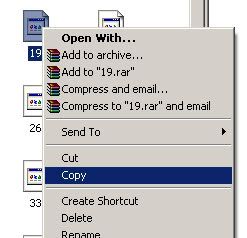
        If your .dat says 100-#-#, that means it's in ROM3. (These are mostly CoP .dats.) Find your dat, copy it and paste it someplace else. Preferably someplace you'll remember.

        Nothing is worse than suddenly realizing that your Taru looks like a hedgehog that swallowed a hand grenade and there's nothing you can do to fix it.

        Now, both VRS and the Viewer itself will automatically try to back up your files. But things can and will go wrong.

        If something really screws up, you can ask the nice folks at whichever .dat forum you frequent for a copy of the original. But honestly, that's a ton of trouble that can be prevented by a simple copy and paste. So, once again:

        BACK UP YOUR FILES.

        -Step 2
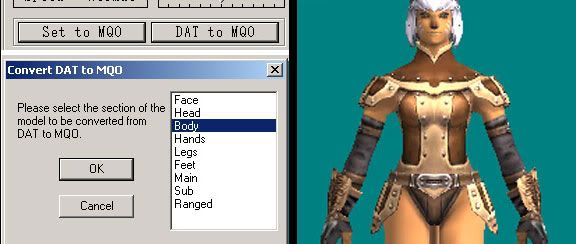
        Okay, after you've found and backed up your .dat, you can begin to edit it. GO down to the "DAT to MQO" button and hit it. It will bring up a menu. Select the armor piece that you are editing and click "OK." This will prompt you to save the file someplace. Do so (make sure you can find it^^).


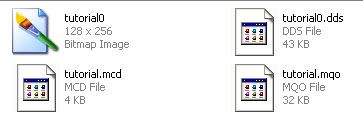
        Go find your file. Depending on the model you saved, you'll have at least four files. Some models, especially the NPC ones, may have more.


        To change the skin, you'll want to open the .bmp file up in your favorite image editing program. I use Photoshop, personally, but anything that opens and saves .bmp files will work. Layers will help a lot, though.

        Once you open the file, you can't save it again at a larger or smaller resolution than it is now. It won't load back up in the viewer. The layout for each of the skins is more or less the same for every race. (Tarutarus tend to be somewhat different bodywise, and Mithras/Galkas have tails, though.)

        Edit your skin however you want. For an example, we'll use my lizard armor.


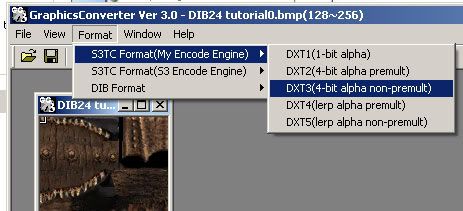
        Once you're ready to see how it looks, save it again as a .bmp. (If you're using Photoshop, make a backup in .psd format to preserve your layers.) Now, open up Graphics Converter 3. In there, open your .bmp file. Go to Format >>> ST3C Format (My Encode Engine) >>> DXT3(4-bit alpha non-premult).


        This will convert it into a .dds file. The .dds file is the one that gets wrapped around your mesh. Save it.

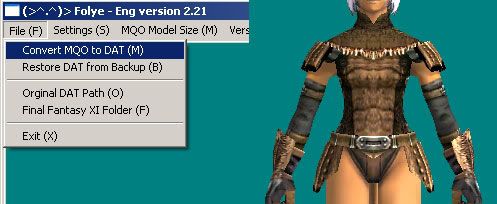
        Go back to the Model viewer and make sure that the model you have up is the one that you converted. Go up to "File" and hit: "Convert MQO to DAT." Now load up your .mcd file, and voila!


        If you don't like what you've done and want to go back to your original armor, just go to File >>> Restore DAT from Backup, and choose your .dat number from the list.

        Comment


        • #5
          Re: Tutorial: .Dat Editing for Newbies

          -Step 3
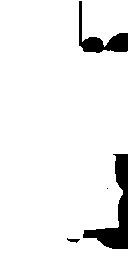
          Now, you'll notice on the .dat I just did that there's some strange, blackish-gray blotches. We don't want these. Thus, in order to get rid of then, we're going to use Alpha Mapping.

          An alpha map tells the program that you want a section of the skin to be totally transparent. Don't worry. It's tons easier than it sounds.

          Open up your .bmp file again. Then, save it with a different name. I use Phabin's suggestion and call it "myskina.bmp". It makes it a lot easier to find then.

          Here's where you really need a program that will do layers. In Photoshop, the easiest way to do this is to create a new layer, fill it in with white, and set the layer's blending mode to "multiply." This will turn the white transparent.

          Take your pencil tool (A sharp, pixilated edge makes this much easier) and, with black, color over the area you want to be transparent. Save it again. Make sure it is also a bitmap, and that it is the exact same size as your original .bmp file.


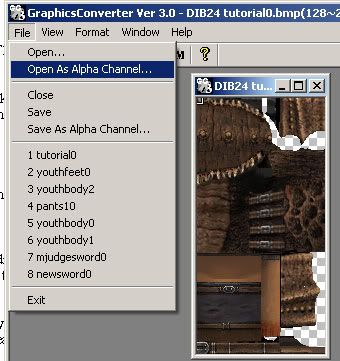
          Go back to Graphics Converter 3. Open up your original .bmp (myskin.bmp). Go up to File >>> Open as alpha channel and chose your alpha map (myskina.bmp). The parts that were black on your alpha map should now be transparent.


          If you chose the wrong file, you'll either get an error message, or your whole skin will go kinda see-through. Not what you want.


          Convert it once more to .dds. Be sure you use: Format >>> ST3C Format (My Encode Engine) >>> DXT3(4-bit alpha non-premult). The alpha map has a very good chance of not working otherwise. Back in Model Viewer, convert your .mqo to .dat, and you're done!


          (Note: Stromgarde has explained to me that alpha maps will not work on things that have a material attached to them, i.e. shiny stuff. So shiny armor/pauldrons/shield cannot be alpha mapped.)

          If you want to edit a skin that already has an alpha map of some kind, open up the original .dds file in the Graphics Converter and select: File >>> Save As Alpha Channel. (You wouldn't believe how long it took me to figure this out...) It will save the transparency for you.

          -Step 4
          Finally, you can edit the mesh itself. There are two different programs that I know of that allow you to do this. One is Metasequoia, and the other is Virtual Reality Studio, also known as VRS. Each is really a tutorial all on it's own, so I'll only discuss them briefly here.

          There are plusses and minuses to using each of the 3D programs.

          Metasequoia can:
          -Easily move vertices/lines/meshes
          -Easily resize meshes
          -Show relationship between mesh and unwrapped skin (Doesn't really work for merged meshes)
          -Quickly show top, front and side views simultaneously.

          Metasequoia cannot:
          -Delete vertices/lines/meshes
          -Add vertices/lines/meshes
          -Allow you to edit skeleton weights
          -Allow .dat porting (switching a .dat from one race to another, or from NPC to PC.)

          VRS can:-Delete vertices/lines/meshes
          -Add vertices/lines/meshes
          -Allow you to edit skeleton weights
          -Allow .dat porting (switching a .dat from one race to another, or from NPC to PC.)
          (In the new, untranslated version):
          -Allow you to change animations
          -Possibly allow you to edit the skeletons themselves. (Not sure on this one.)

          VRS cannot:
          -Easily move vertices/lines/meshes
          -Easily resize meshes

          Note that "cannot" doesn't necessarily mean that's it's impossible to do in the program, it just means that it will not render correctly ingame or it's clunky and difficult to do.

          To really be able to edit .dats thoroughly and easily, you should learn use both of them.

          -Step 5
          If you want to see what your .dat looks like, but don't necessarily want to replace some in game armor/weapons, here's how to edit your Model Viewer lists.

          Make a new folder in ROM of your FINAL FANTASY XI file. I call mine "Fan." Take your newly edited .dat (Or the .dat that you plan to edit) and copy it into the folder. If you've already finished your editing of an ingame .dat, don't cut it out of its original file, your game will crash.


          I like to rename them to something recognizable, like newlizardm.dat, but that's up to you.

          Once you've got it in the new folder, look for the "List" file for your Model Viewer. Mine's in the FINAL FANTASY XI folder already, so I just go there.

          We changed the Mithran body piece, so we open Mithra_Bd.lst. It should open up just fine in Notepad or Wordpad. If you accidentally put it in a different list, it'll either display over another model (this means it's in the wrong armor slot) or it'll look like it exploded (this means it's being loaded on another race.) Though, honestly, you probably will have figured this out before then.

          Decide where on the list you want it to show up and type in:

          "Folder Name"-".dat name",".dat title"

          So my new .dat will be:

          Fan-newlizardm,Redone Lizard Jerkin

          Resave the list, restart the Model Viewer and there you go!

          Comment

          Working...
          X